
In this tutorial, you will learn how to add a Confirmation Box in your Fl utter Application.
Creating Alert Or Confirmation Box
 |
We will create a widget that will contain an Alert Box with a button where you can perform some actions by pressing the button.
Widget alert() {
    return AlertDialog(
      title: Text("My title"),
      content: Text("This is my message."),
      actions: [
        FlatButton(
          child: Text('Ok'),
          onPressed: () {
            Navigator.of(context).pop();
          },
        ),
      ],
    );
  }
In the above code, we have created a function that returns the AlertDialog() widget with properties:-
title: The title you want to show in the Confirmation Box.
content: The message or content you want to show in the Confirmation Box.
actions: It contains the list of Button Widget you want to add to the Confirmation Box which will some actions.
In the actions, we have one FlatButton() which performs action i.e it navigates to the last screen.
Assigning Alert Box to Button
Now that you have completed the above steps we will continue by assigning the AlertBox named as alert() to a button so that when someone presses the button the Alert or Confirmation Box will show with a button.
RaisedButton(
          child: Text('Confirm'),
          onPressed: () {
            showDialog(
              context: context,
              builder: (BuildContext context) {
                return alert();
              },
            );
          })
Here we have a RaisedButton() with the child as Text() and onPressed action with widget showDialog() (it is needed to show the Alert Box) which has the following property:
context: you have to specify the BuildContext.
builder: it's the function with parameter as context.
The builder method returns alert() widget which we have created in the above steps which shows the confirmation message with some action.
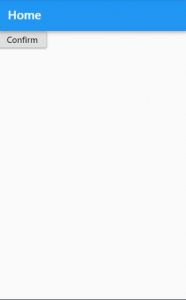
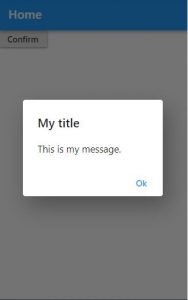
In the above screenshots, we can see that when you click the Confirm Button then the Alert or Confirmation Box shows with the Title and message and one button that we added names as 'Ok'
Complete Code
Below is the complete code that we have implemented in this blog and it's working, you can check it by copying and pasting it on your preferred IDE.
import 'package:flutter/material.dart';

void main() => runApp(MyApp());

class MyApp extends StatelessWidget {
  @override
  Widget build(BuildContext context) {
    return MaterialApp(
        title: 'Flutter Demo',
        debugShowCheckedModeBanner: false,
        theme: ThemeData(
          primarySwatch: Colors.blue,
        ),
        home: MyHomePage());
  }
}

class MyHomePage extends StatefulWidget {
  @override
  _MyHomePageState createState() => _MyHomePageState();
}

class _MyHomePageState extends State<MyHomePage> {
  @override
  Widget build(BuildContext context) {
    return Scaffold(
      appBar: AppBar(
        title: Text("Home"),
      ),
      body: Body(),
    );
  }
}

class Body extends StatefulWidget {
  @override
  _Body createState() => _Body();
}

class _Body extends State<Body> {
  Widget alert() {
    return AlertDialog(
      title: Text("My title"),
      content: Text("This is my message."),
      actions: [
        FlatButton(
          child: Text('Ok'),
          onPressed: () {
            Navigator.of(context).pop();
          },
        ),
      ],
    );
  }

  Widget build(BuildContext context) {
    return Column(children: [
      RaisedButton(
          child: Text('Confirm'),
          onPressed: () {
            showDialog(
              context: context,
              builder: (BuildContext context) {
                return alert();
              },
            );
          }),
    ]);
  }
}


0 Comments
Don't Spam In Comments