
In this tutorial, you will learn how to add WebView in your Flutter application.
What Is WebView?
It allows Android apps to display web content. This component is pre-installed on your device and should be kept up to date to ensure you have the latest security updates and other bug fixes.
Adding The WebView Plugin
There's an official plugin for Webview in Flutter which is available here and it is made by the Flutter team. Add it to your pubspec.yaml file where all the dependencies are listed.
webview_flutter: ^1.0.7
Now that you have added the plugin to your dependencies, we will continue towards the next step.
Creating WebView
WebView(
        initialUrl: 'https://flutter.dev/',
        javascriptMode: JavascriptMode.unrestricted,
      )
Now it's time we create a WebView widget and implement it in our app. Here the WebView widget takes some parameters and they are:
initialUrl: the URL of the website you want to show
javascriptMode: it enables the WebView to run JavaScript. By default, it is disabled, and in order to run JavaScript we have to set JavaScriptMode to unrestricted.
Note: If you want to make sure that the WebView should be responsive and cover the entire screen then you should add an Expanded widget to its parent.
Complete Code:
import 'package:flutter/material.dart';
import 'package:webview_flutter/webview_flutter.dart';
void main() {
runApp(MyApp());
}
class MyApp extends StatelessWidget {
@override
Widget build(BuildContext context) {
return MaterialApp(
home: Body(),
);
}
}
class Body extends StatefulWidget {
@override
_BodyState createState() => _BodyState();
}
class _BodyState extends State<Body> {
@override
Widget build(BuildContext context) {
return Scaffold(
appBar: AppBar(
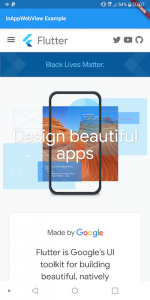
title: Text('InAppWebView Example'),
),
body: Expanded(
child: WebView(
initialUrl: 'https://flutter.dev/',
javascriptMode: JavascriptMode.unrestricted,
),
),
);
}
}
Above is the code that we have implemented in this blog and you can just try it out in your Flutter Application.


0 Comments
Don't Spam In Comments